Create your first worksheet
We assume that you have installed the Sample Interactive Grids application for which we want to write a simple test. Additionally, we assume that login credentials for a test user within your Oracle APEX instance are available.
We use Application ID 101 for our sample application. Depending on your installation that number can be different.
Inspect the application
Before we write our test definition, let's explore the use case we want to reproduce! Imagine an application where an end user wants to add employee data to a table. We use the Sample Interactive Grids application which demonstrates various Interactive Grids which are common in Oracle APEX applications.
- Open the application
- If you have developer access to Oracle APEX, open the App Builder and click on the Run button next to the application name. The application will open in a new browser tab.

- If not, ask your admin about the URL.
- If you have developer access to Oracle APEX, open the App Builder and click on the Run button next to the application name. The application will open in a new browser tab.
- Enter your credentials and click Sign In.
- Click on the icon in the top left corner to open the navigation menu.

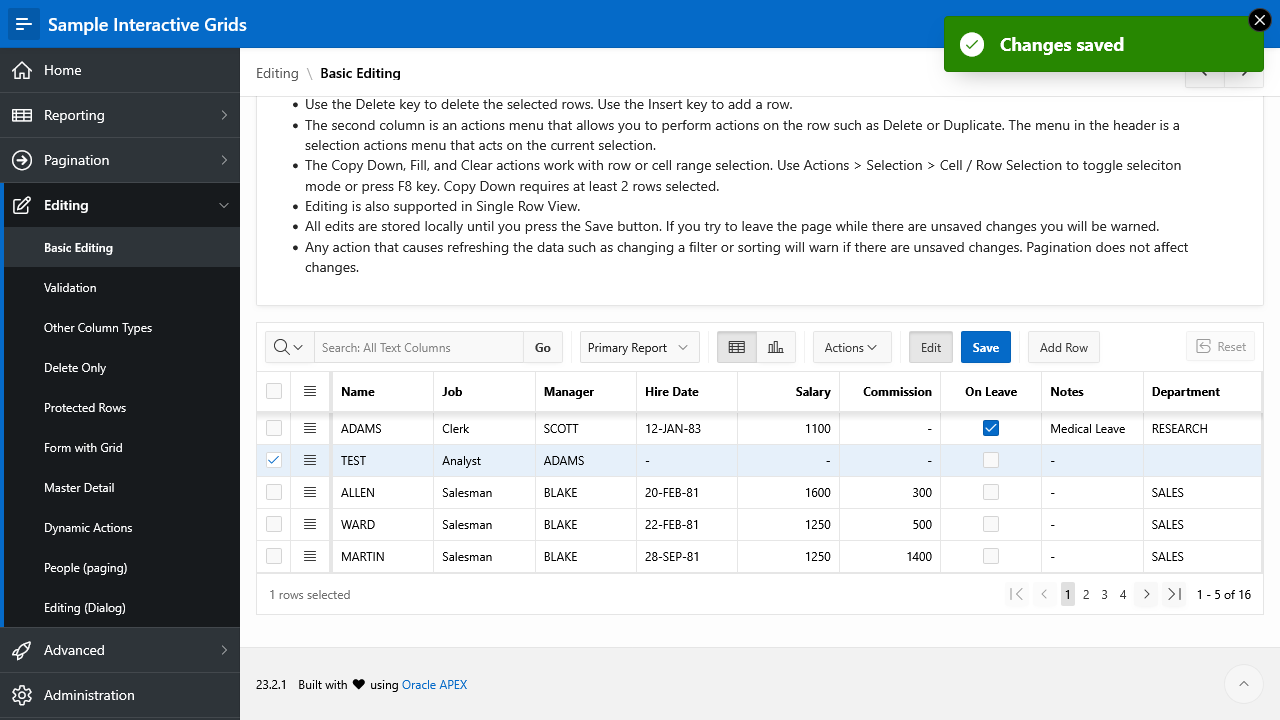
- Click on Editing and then on Basic Editing
- In the table, click on Add Row. A empty row will be added to the table and the cursor will be added in the Name column.
- Enter the following information into the table row:
- Name:
TEST - Job:
Analyst - Manager:
ADAMS
- Name:
- Click on Save to apply the changes
- A message box with the text Changes saved appears. It indicates that the data was successfully saved.
If you want to delete the row, use the menu icon which is located to the left of the Name column and select Delete Row. Then save your changes again by clicking the Save button.
Create a Worksheet
Worksheets are collections for test cases and the top-level elements of LCT. Usually, a Worksheet is created for each individual application or module that shall be tested.
After logging into LCT using your developer account, you will see the Worksheets page. In the buttons row above the table, click on + Add Worksheet.
In the dialog, enter the following information:
- Worksheet Name: Sample Interactive Grids
- Application ID: 101 - Sample Interactive Grids
Click on + Create. The dialog closes and the Worksheet appears in the table. Select Go to Worksheet from the menu icon on the left side for the row. The case editor will be opened.
Add a test using the wizard
Let's imagine we have a use case where a user wants to add employee data to a table.
Various actions must be performed:
- Log in into the app
- Navigate to the edit page
- Enter and save the data
The use case will be represented and tested by a Test Case in LCT. We recommend writing exactly one test for each use case to avoid expensive changes if the application changes in the future. A test case consists of various test steps. Steps are the individual actions that will be performed on the page when the test runs.
After each dialog page, click on Next to go to the next page.
- Click on + to add a new test case
- Note: If the Worksheet is empty, you can use the green + button. Otherwise, the button next to the Cases label is always available.
- In the dialog, choose Case via Template
- An wizard with multiple steps opens. Enter the following information in the following dialog pages. After adding all values within a page, click on Next > to go to the next one (exception for step 1: Create and add Steps >). Pay attention to the values which we have entered when exploring the application manually.
- Define Case
- Name: Basic Editing
- Choose Template
- Application: 101 - Sample Interactive Grids
- What should be tested?: Add a row to an IG
- Test on Page: Basic Editing
- Define Login Steps
- Login Needed: Yes
- Login Page: 101 - Login
- Username: (The username of your test account)
- Password: (The password of your test account)
- Login Page Buttons - Choose Button to Click: Sign In
- Set Modal Trigger
- Page to test is a modal and needs to be triggered: No
- Define Steps for adding an IG Row
- Interactive Grid: Basic Editing
- Type the following strings in the column Value:
- Name:
TEST - Job:
Analyst - Manager:
ADAMS
- Name:
- Add Click-Step for Add Row-Button: Yes
- Add Click-Step for Save-Button: Yes
- Note: You don't need to change the default values for both buttons
- Define Case
Now click on Finish. The test case will be created and appears in the list on the left. Select it to open the corresponding steps. The wizard has created a sequence of steps based on our input in the dialog pages.
Add some additional test steps
The wizard is very useful for defining the general structure of a test. But we also want to further adapt our test case to our application.
First, let's add an assertion step for checking that no error message has occurred:
- In the steps grid, click on + Add Step
- Select checkForErrors from the list
- Enter a name for the step
- Note: You can use a default name here. Click on the text Check for errors on the current page below the textbox to insert this text.
- Select No Errors Expected
- Click on Create to create the step
For documentation purposes, we want to take a screenshot:
- In the steps grid, click on + Add Step
- Select screenshot from the list
- Enter a name for the step, for example Take a screenshot
- Choose a file name for your image, for example
screenshot_1- Note: You don't need to type the .png file extension. It will be added automatically.
- Click on Create to create the step
Now we are ready to execute this test.